The Brunswick Rifle: Part 1 > Part 2 > Part 3 > Part 4
In January 1837, the Adjutant General Maj.-gen. Sir John MacDonald, approved of the suggestions made, and the 2000 rifles in course of preparation were ordered to be made accordingly. Lovell had already made one slight alteration before this by changing the furniture from iron to brass. On 3rd February however, he put forward his plea for the standardizing of the ball for military use. Under these proposals, the bore of the rifle would be increased to .704 in. The Board in conjunction with the Commander-in-Chief formally agreed to this policy on 4th August. Several of these musket bore rifles were set up right away as patterns.
Troops were issued with the bullets tied up within greased calico patches and marked with a black band to show the location of the belt to aid in loading.
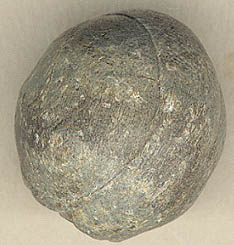
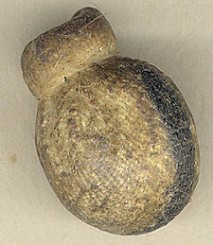
The best effect was obtained by using a loose ball in a greased calico patch, and it was suggested that two thirds of the ammunition should consist of this kind, with the powder charge of 2 ¼ drams contained in blank cartridges.
The remainder should be normal cartridges with balls of 17 to the lb. for use in the line when rapid firing was necessary. Under ideal conditions high rates of fire – for a rifle – had been recorded; with the belted ball, 10 rounds in 7 ½ minutes, and with the cartridge, 10 rounds in 4 ½ minutes. This compared with 10 rounds in 3 ½ minutes, the average with a smoothbore musket.
The powder charge of 2 ½ drams of coarse musket powder was sealed within blank paper cartridges Soldiers were also supplied with with standard infantry cartridges containing powder and smooth ball so the weapon could be fired rapidly should the need become necessary.
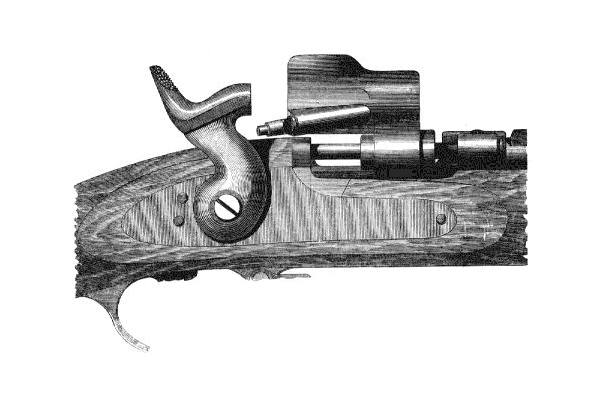
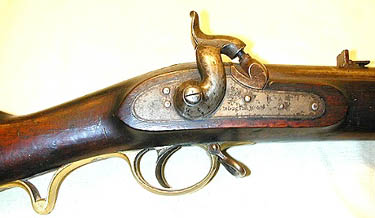
In 1841 a second model Brunswick was introduced. It was similar but substituted a conventional sidelock for the back-action version. Comparing this to the third pattern lock you will note that the plate that helps contain the mainspring is fixed from the interior with a screw, a factor which was eliminated in the third pattern where the plate was brazed. The second pattern lock on the left also shows the early style ‘Hook mainspring as compared to the later lock on the right with the ‘Stirrup-fastened mainspring.
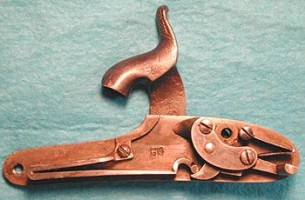
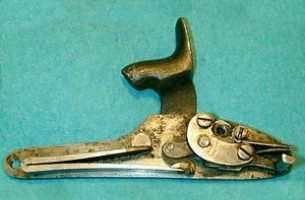
The screw head protruding into the sideplate is visible below the hammer face
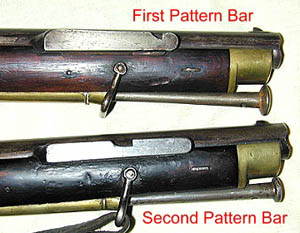
The hook breech was eliminated and the sword bar was modified by moving the catch notch to the center for more stability. The first pattern bar had the bayonet fixed to the front end which was changed later and also adopted by the Second pattern.
The forend and both bars are shown here.
Those interested in the Brunswick Rifle are referred to
‘The Much Maligned Brunswick‘ by De Witt Bailey, published in Research Press Digest 2025.